Monday, 18 July 2016

Quick Post: Beach Inspired Nails (with Pictorial)

Hello friends, I hope you're all enjoying your summer! It's been so hot here in the past few weeks with barely any rain, so it just feels dry all the time. I really wish I could spend a day sitting by a beach. A day off from work would be so nice, but that's not happening anytime soon, so my nails will have to do. These beach nails I'm wearing right now are for the beach prompt for SNCjuly2016. 
For these nails, I finally used the fan brush that has just been sitting around in my storage bin been the past year. I avoided using the fan brush because I just didn't know how, and none of my designs really required the techniques that could be executed with the brush. I really like how it turned out though, the ripples in the water looks more realistic. From this experience with my fan brush, I know that I definitely want to try doing more designs with it!
Continue reading to see how I created my beach nails...

Sunday, 10 July 2016

Ancient Egypt Nails for SNCJuly2016 (with Close-Up Photos)

Hello friends! The next prompt for _nailaddiction's Summer Nails Challenge (#sncjuly2016) is "Egypt", and this is my  Ancient Egypt inspired manicure for the week. As a child, I was always fascinated with Ancient Egypt. I was particularly drawn to the mysterious and beautiful symbols that adorned the tombs of the great pharaohs and their intriguing calligraphy. With this week's design, I tried my best to incorporate some of the gorgeous symbols that are commonly associated with Ancient Egypt.
On my left hand, I am wearing a Uraeus (cobra) on my thumb, which was used as symbol of royalty or authority and represented the Goddess Wadjet. This cobra, along with the striped design on my index and pinky fingers, were inspired by the mask of the mummy of Tutankhamun. On my middle finger is a scarab, which were very popular amulets in Egypt. This is followed by the Sun God Ra depicted as a bird. On my cinderella (right) hand, I went with more simple designs. The symbol on my thumb is the "Eye of Horus", which represents royal power, protection and good health. Next is the Ankh which symbolizes life. Finally, I decided put a Mau (cat) symbol on my ring finger because the ancient Egyptians worshiped them.
I feel very strange when I look at my hands because of the difference in the designs. With one being so simple and so bold and the other colourful, my eyes don't know which hand to focus on! Both of these designs makes for very beautiful manicures though, so to see how I created them and for a closer look at these designs, please continue reading....

Sunday, 3 July 2016

Tutti Frutti Nails + BornPrettyStore Item Review!

Hello friends, and Happy July! The year's half over already, can you believe that?! This month, I was asked by _nailaddiction on Instagram to join in her summer weekly challenge; the prompts looked so fun that I had participate! The first prompt of this month is "fruity" nails, so I did some mix & match of different kinds of fruits. Last year, at around this time, I did a bunch of fruit inspired nails nails as well; if you wish to see those, click here.

A couple of months ago, I received a mini palette ring from bornprettystore. I've use it quite a few times to create various looks, but I finally got around to actually taking some pictures of the process! The ring is one of the cutest nail art tools I have ever seen! They're super easy to use and makes clean-up so much faster. Prior to getting this palette, I would regularly use yellow sticky notes, tiny pieces of wax paper or tin foil to mix my paints/polishes. Though such materials were easy to find, they were messy as I would always mistakenly place my brushes on them by accident and make a mess of my tools. With this ring on my hands at all times, there is little to no chance of me leaving my nail tools around and having them roll into the palette. This palette is also reusable and reduces the amount of paper and foil waste I produce each time I do my nails.
To use this cute nail palette, simply dab a small amount of polish or paint in one of the tiny wells and use as you would any other palette. The medium used may dry up a quickly due to the shallowness of the well, but water, nail polish thinner or acetone may be mixed in to get it to return to a workable consistency. The palette ring does come with a tiny cup that you can use to hold the thinning liquids but I did not find it very helpful since tilting my fingers around to draw the designs would prompt it to spill out. However, you can choose to use the cup to hold a larger amount of acrylic paint, such as black paint when outlining. Once done with the palette, simple wipe off the polish with some nail polish remover or the acrylic paint with water. It's as easy as that! I'd honestly give this cute ring a 5/5 because it makes my life so much easier and is way more environmentally friendly than using tin foil or paper! Not only is this ring super cute, but it is also practical.

Now, without further ado, here are my tips and tricks and a pictorial on how to create these super fun nails...

Saturday, 25 June 2016

Quick NOTW Update: Lazy Pink Flower Nails

Hello friends! I just have a quick update this week with these super lazy nails I am currently sporting. I've been exhausted this past week from all the training for my new job so I wanted to do the easiest design I could think of. Although I can't say much for thow the design looks, I do really enjoy how these two colours compliment one another. The darker pink is "Raspberry/Fuschia" from Crabtree & Evelyn, which is simply gorgeous and extremely pigmented; I don't even think I used a second coat! The light pink colour is PK114 from theFaceShop, which is a nice pale/pastel pink. However, it is a bit streaky and I needed several coats to get the desired opacity.
As for the design, it's a simple one that really just relies on the brush and requires minimum skill and effort. SImply use a small round brush (or even a dotting tool) to create these petals.
Anyway, that's all for this week! Tune in next week where I'll be attempting _nailaddiction's summer weekly challenge for the month of July.


Friday, 17 June 2016

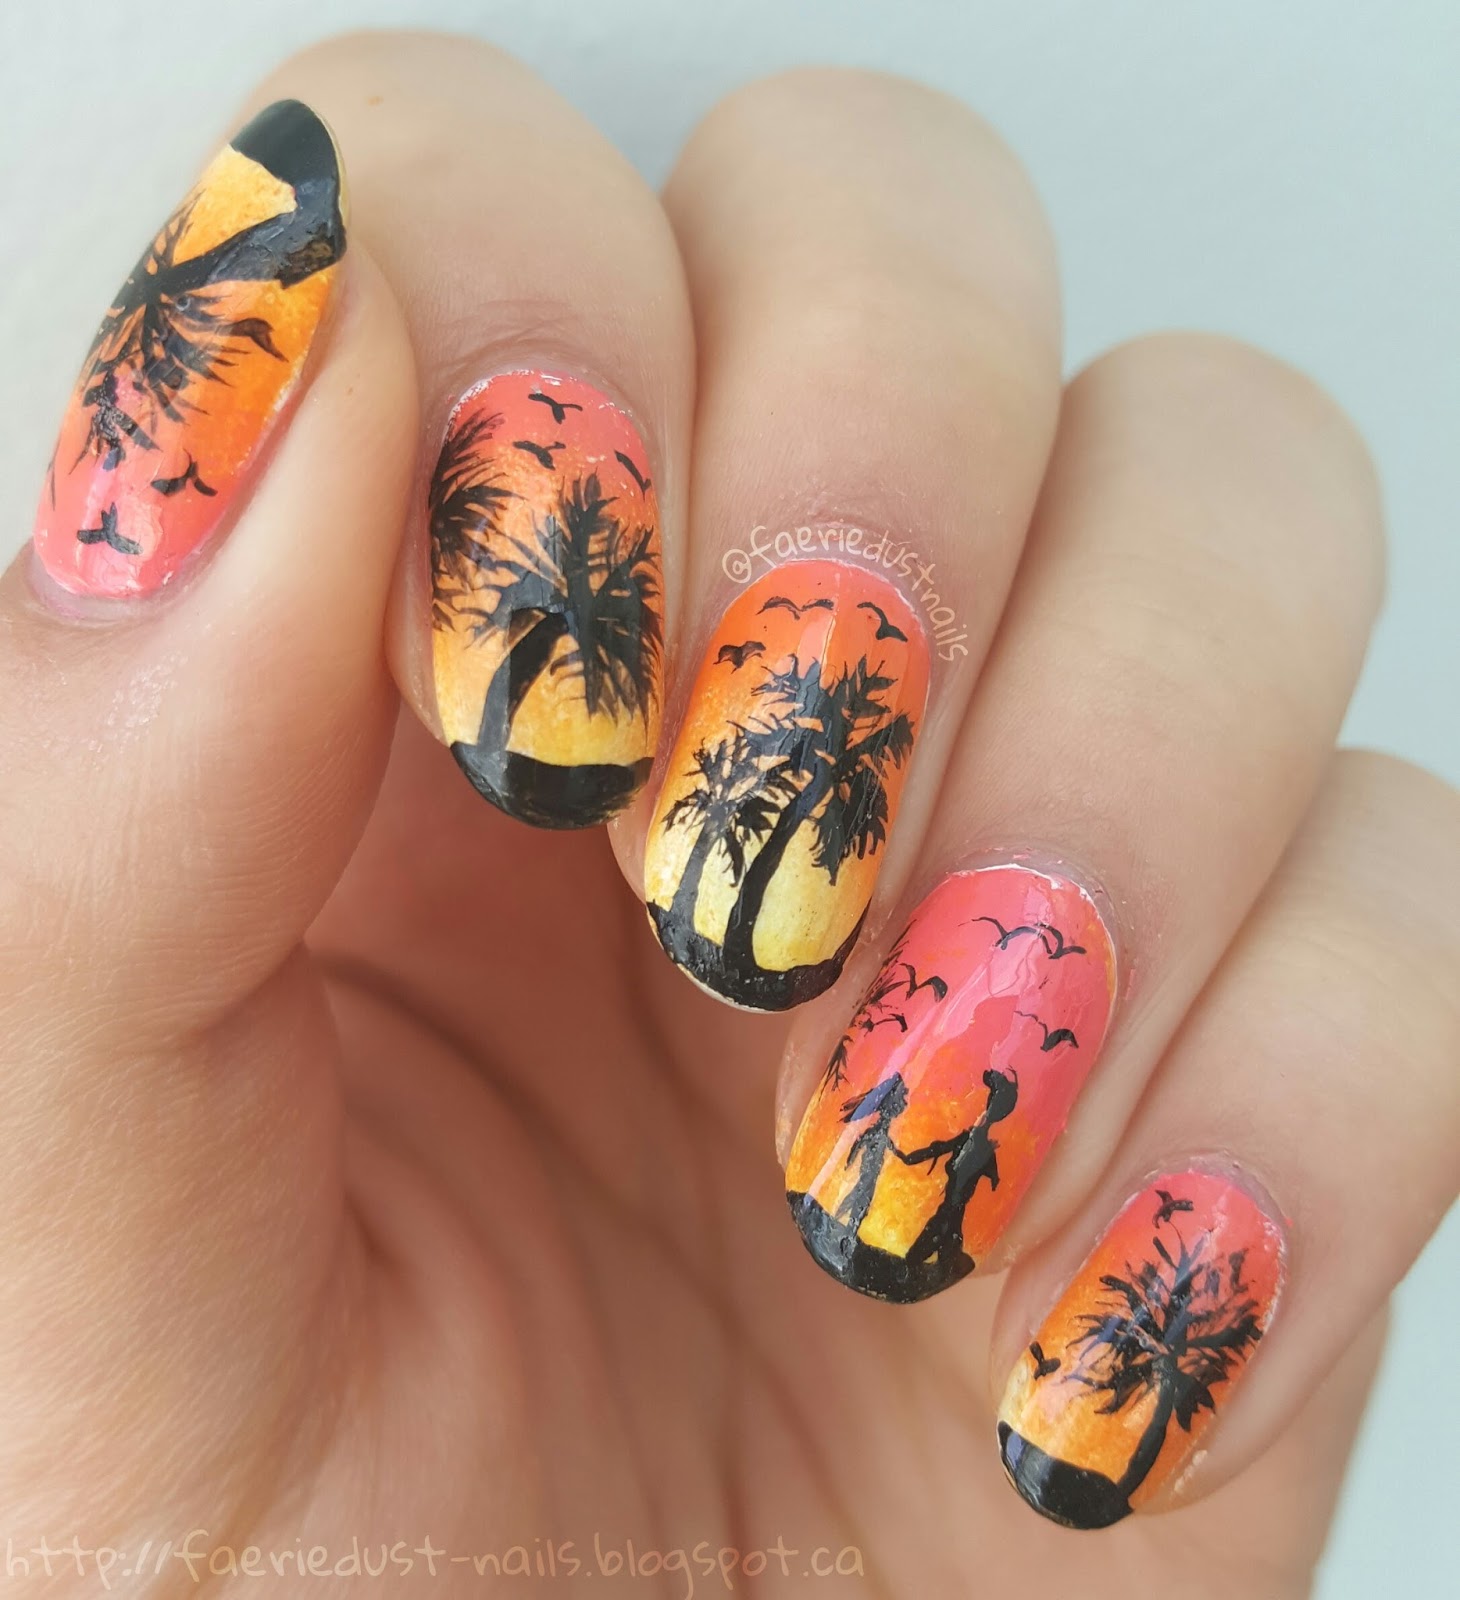
Sunset Walk on the Beach (For WNAC 2016)

Hello friends! It's been such a lovely week down here in the GTA though it is pretty hot today. My nails this week follow the third prompt for WNAC2016, which is "palm trees".  This is super strange, but I can honestly say that I am jealous of my nails. I could really go for a long walk on a beach right now! I just started training for my second job today (which I am super excited about), but I am just so tired. Growing up is hard, I'm barely an adult but I'm already reminiscing the summers where I'd spend my days just chillin' out and drawing all day. Those were the good days, ah. 
This week, I decided to film yet another design tutorial.  I've also been working with various video editing software to test out which one works best for me (and my computer). Normally, I'd use Sony Vegas, but the video playback lags so much that i's difficult to preform even the simplest of tasks like trimming a clip! Now, this may be a sign that I need a computer upgrade, but since I mostly use my computer for school work, I don't really need an upgrade just yet; unless I do decide that I'm serious about making these videos. 
Anyway, I'll be working on the video for the next week and will try to have it up before next week;, depending on my work schedule ( & how tired my jobs will make me). Until next time, goodbye friends and happy polishing!

Friday, 10 June 2016

(Quick Post) Seashells for Wnac 2016

Hello friends! This week's design follows WNAC2016's Second prompt for June, which is "sea shells". I had quite a difficult time with this design, and it didn't come out how I wanted it to, so I will not be posting a pictorial for the progress. I did however take a video, but I'm very unsure about posting it because I have no idea of how to edit such as thing as I've never done such a thing before. I may update this post with a video if I end up making it.
The only nail that turned out how I wanted it to was my thumb nail, it turned out the clearest. My index finger ended up being the worst because that's the one I was filming and had trouble drawing with my camera in the way. 


Friday, 3 June 2016

Waves for WNAC2016 (with Pictorial)

Hello friends and welcome to my second post of he week! These days, I've been working around 6 days a week at this small family diner type place and it's been very difficult to keep my nails long or square. It's very tricky for me to keep my nails in a square shape since the corners always manage to chip off no matter how careful I am. I really enjoy the look of square nails on my hands though, they make my short stubby fingers look more elegant; but I guess I'll have to have short little nubs for the time being since they're the most practical.
While scrolling through instagram yesterday, I made the decision to join in the Weekly Nail Art Challenge once more. I quite enjoy how WNACs are planned out and how the prompt dates always correspond with my schedule.  The monthly theme for June 2016 is the beach (how fitting!) and the first prompt is water inspired nails. This prompt gave me that little push I needed to do a nail design that I've had saved in the back of my mind for a while, but was too lazy to do. 
These nails are inspired by a woodblock print by the Japanese artist Katsushika Hokusai named The Great Wave Off Kanagawa. Hokusai makes wonderful woodprints and I especially love pieces of his work that involved water because they have so much movement and power in them. Obviously, my version of them take on a more simplified and line-art like approach. I tried very hard to create more movement in the waves using the black lines. I also added little tiny birds to fill up the negative above the waves and to make it look like an ocean scene.

Read on to see my tips and tricks fo creating these nails (and a step by step pictorial)